Introduction
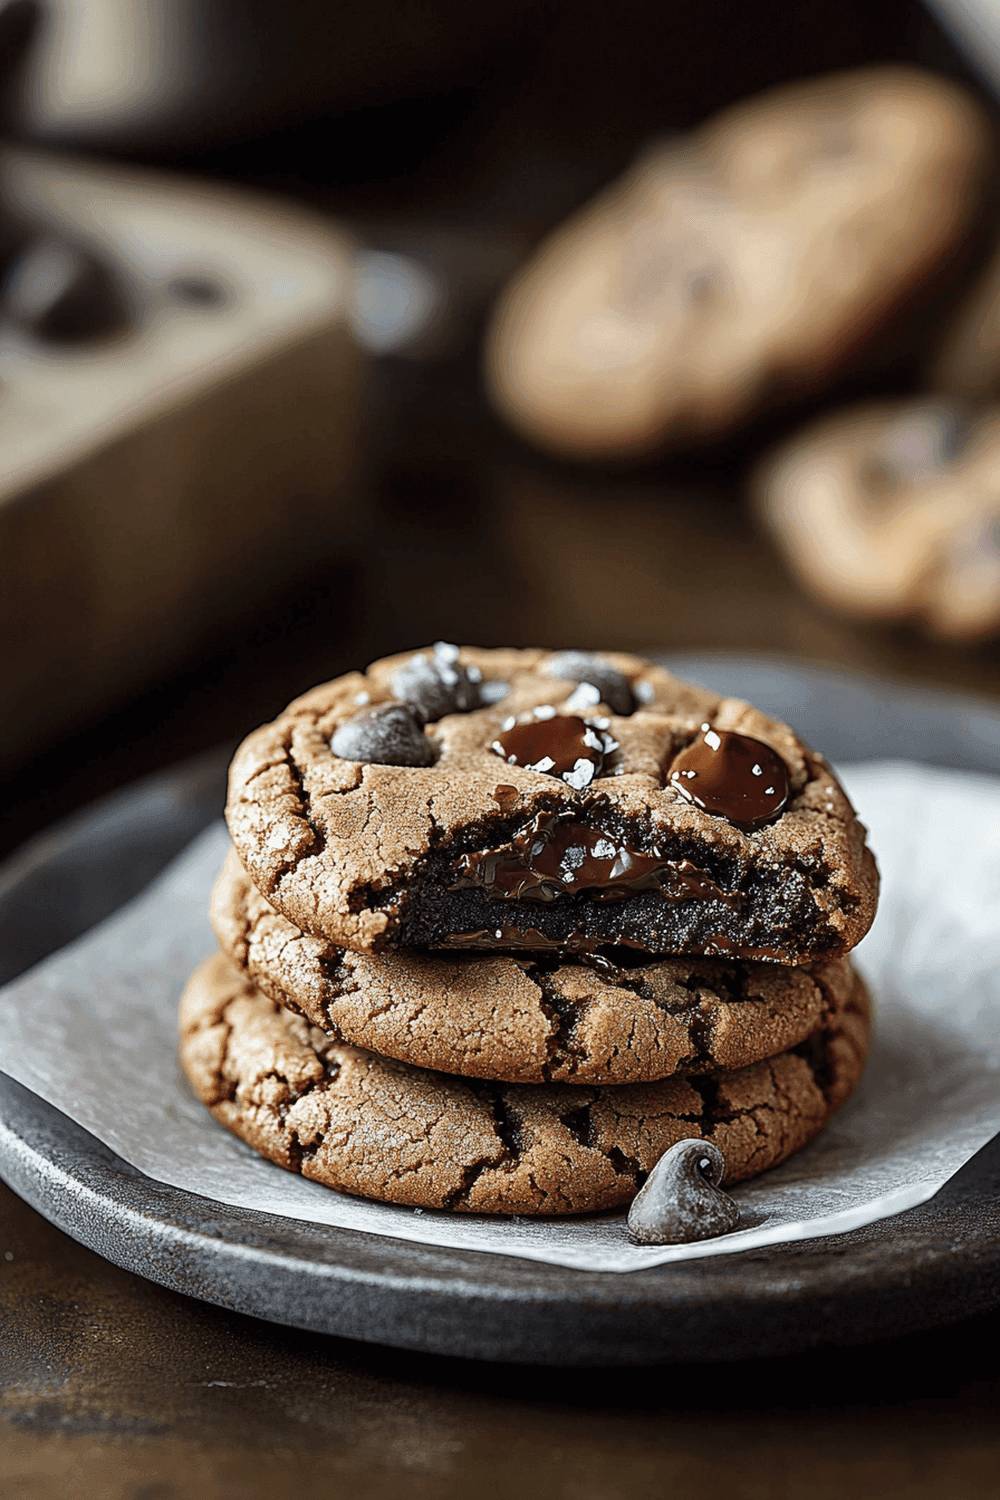
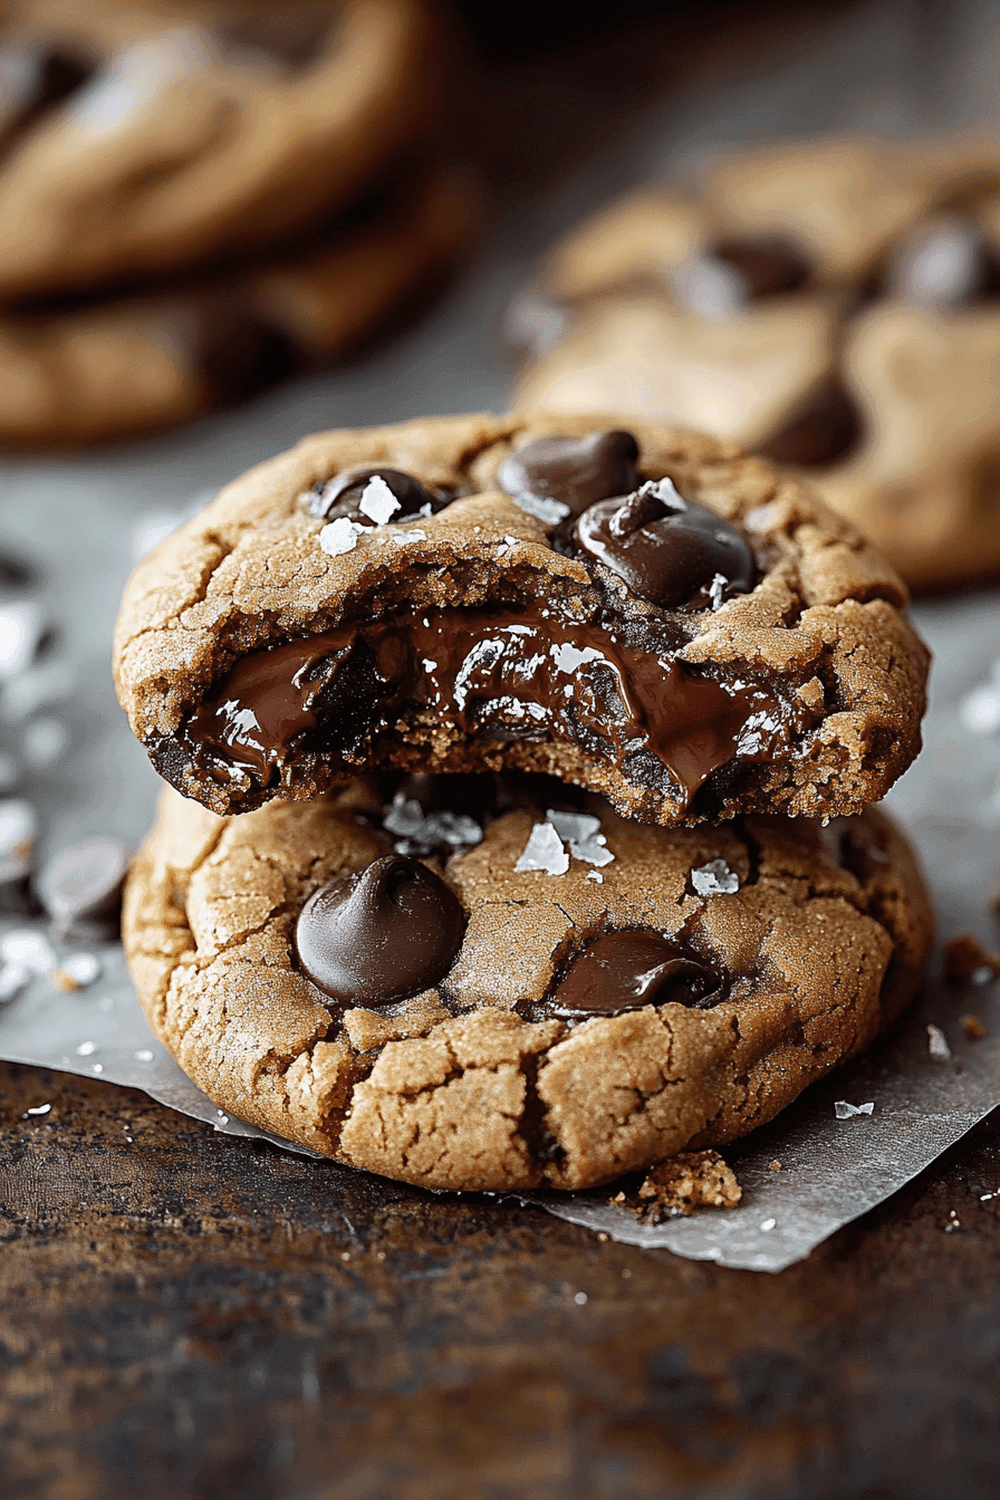
Are you ready to elevate your cookie game? Look no further than these irresistible Nutella-Stuffed Chocolate Chip Cookies. This recipe combines the classic comfort of chocolate chip cookies with the rich and creamy goodness of Nutella. Imagine biting into a warm cookie only to discover a luscious center of melted hazelnut spread that takes your taste buds on a delightful journey. Not only are these cookies delicious, but they’re also simple to make, making them perfect for any occasion. Whether you’re planning a cozy family gathering or looking for a treat to share with friends, these Nutella-Stuffed Chocolate Chip Cookies will definitely steal the show.
Baking these cookies is an enjoyable experience that brings the whole family together. Kids love helping out in the kitchen, especially when it comes to filling those dough balls with Nutella! As you whip up the dough and scoop out spoonfuls onto your baking tray, the aroma of melted butter and vanilla will fill your home—creating an inviting atmosphere that makes everyone feel at ease. So grab your apron, preheat your oven, and get ready to bake some magic! In this article, we’ll take you through everything you need to know about making these scrumptious treats from scratch.

What You’ll Need
Creating the perfect batch of Nutella-Stuffed Chocolate Chip Cookies requires a few essential ingredients and some kitchen tools. First off, make sure you have all the necessary ingredients ready before diving into the recipe. This preparation will streamline the process and ensure that your cookies turn out perfectly every time.
For this delicious treat, you’ll need high-quality chocolate chips as they are central to achieving that iconic cookie flavor. Additionally, having fresh eggs and softened butter is crucial for proper dough consistency. Don’t forget about flour; it serves as the foundation for your cookie structure. Finally, gather some vanilla extract for that unbeatable aroma and flavor enhancement.
In terms of kitchen tools, make sure you have mixing bowls, measuring cups and spoons, a baking sheet lined with parchment paper, and an ice cream scoop or tablespoon for portioning out the dough. With these items on hand, you’re all set to embark on your cookie-making adventure!
Ingredients with precise measurements
- All-Purpose Flour
All-purpose flour is essential for creating the structure of your cookies. It provides strength while allowing for just enough tenderness when baked correctly. For this recipe, you’ll need 2 1/4 cups of all-purpose flour. Be sure to measure accurately; too much flour can make your cookies dry.
- Baking Soda
Baking soda acts as a leavening agent in this recipe. It helps create that soft texture by allowing air pockets within the dough as it bakes. You’ll want to use one teaspoon of baking soda to achieve just the right amount of lift without altering flavor.
- Salt
A pinch of salt enhances all flavors in baked goods—it balances sweetness while bringing forward rich chocolatey undertones in each bite. For this recipe, add 1/2 teaspoon of salt; it’s just enough to elevate those delicious flavors without overpowering them.
- Unsalted Butter
Unsalted butter not only adds richness but also contributes moisture to keep your cookies soft and chewy. Use one cup (two sticks) of softened unsalted butter for optimal results; this ensures even mixing with sugar while controlling sodium levels.
- Granulated Sugar & Brown Sugar
Using both granulated sugar (3/4 cup) and brown sugar (3/4 cup) gives depth to sweetness while providing different textures—a must-have duo! Granulated sugar creates crispness around edges while brown sugar lends chewiness throughout—resulting in a perfectly balanced cookie.
- Eggs
Eggs provide moisture as well as act as binding agents within the dough—keeping everything together! You’ll need two large eggs at room temperature so they incorporate smoothly into other ingredients without clumping up.
- Vanilla Extract
Vanilla extract elevates flavors significantly; its aromatic qualities enhance overall taste! One teaspoon is sufficient here—it complements both chocolate chips’ richness and hazelnut spread’s creaminess beautifully.
- Semi-Sweet Chocolate Chips
Semi-sweet chocolate chips bring indulgence! Using one cup adds extra bursts of flavor throughout each bite—ensuring every mouthful is packed with chocolaty goodness!
- Nutella
Nutella is where all magic happens! This creamy hazelnut spread serves as our delightful surprise center—two tablespoons per cookie will transform ordinary into extraordinary!
How to Make Nutella-Stuffed Chocolate Chip Cookies
Step 1: Preheat Your Oven
Start by preheating your oven to 350°F (175°C). Preheating ensures even baking throughout each batch while preventing overcooked edges or raw centers later on! While waiting for it heat up—a crucial step—line two baking sheets with parchment paper; it prevents sticking during baking process ensuring easy cleanup afterward.
Step 2: Prepare Dry Ingredients
In a medium-sized bowl combine all-purpose flour (2 1/4 cups), baking soda (1 teaspoon), and salt (1/2 teaspoon). Whisk together until thoroughly combined—this helps distribute leavening agents evenly within mixture! Set aside once finished so we can focus on wet ingredients next!
Step 3: Cream Butter & Sugars Together
In another large mixing bowl beat softened unsalted butter (1 cup) along with granulated sugar (3/4 cup) and brown sugar (3/4 cup) until light fluffy consistency appears—around 2-3 minutes using an electric mixer would suffice here! This step adds air into mixture resulting in lighter texture once baked; don’t rush through it!
Step 4: Add Eggs & Vanilla Extract
Once creamed properly add room temperature eggs (2 large) one at-a-time mixing well after each addition followed by vanilla extract (1 teaspoon). Beat again briefly until incorporated fully—you should see smooth shiny mixture forming which indicates readiness for dry ingredient incorporation next!
Step 5: Combine Dry & Wet Ingredients
Now gradually fold dry mixture into wet mixture using spatula or wooden spoon; do not overmix though—it’s okay if small lumps remain visible since overworking gluten could lead tough textured cookies! Once combined stir in semi-sweet chocolate chips (1 cup); their melting nature will enhance overall decadence!
Step 6: Chill Dough
Cover bowl tightly with plastic wrap then refrigerate dough for at least 30 minutes; chilling allows flavors meld together whilst improving texture yielding chewiness once baked! Use this time wisely by cleaning up mess made so far preparing work area ahead next steps easier later on!
Step 7: Portion Out Dough Balls
After chilling remove from fridge scoop generous tablespoonfuls using ice cream scooper or spoon form balls placing onto prepared sheets leaving enough space between them (about 2 inches apart)—this prevents overcrowding during cooking causing unwanted merging among neighboring balls resulting flat cookies instead rounded ones desired!
Step 8: Fill With Nutella
Using thumb gently press down center of each ball creating indention then place approximately two teaspoons dollop nutella inside each indention before sealing edges back around forming full round shape again sealing tightly ensuring no leakage occurs during bake time!
Step 9: Bake To Perfection
Place trays into preheated oven allowing them bake around 10-12 minutes or until golden brown around edges yet still soft center remains intact—they’ll continue cooking slightly after removal due residual heat so avoid overbaking here protect softness achieved earlier stages when preparing dough initially!
Step 10: Cool Down & Enjoy
Allow warm treats cool on tray for about five minutes before transferring onto wire rack finish cooling completely; patience pays off since letting them rest enhances texture turning gooey inner sections heavenly delectable experience once bitten into savoring flavors melded beautifully together creating pure blissfulness enjoyed thoroughly enjoyed alone shared loved ones alike!

Serving and Storing Tips
Serving Suggestions
These delectable Nutella-Stuffed Chocolate Chip Cookies are best served warm right out of the oven. If you’re hosting a gathering or simply treating yourself at home, consider pairing them with a cold glass of milk or perhaps even coffee—a delightful combination that amplifies those rich flavors present within! You can also serve them alongside ice cream for an indulgent dessert experience; simply place a scoop atop one cookie creating mouthwatering sundae-like treat everyone will adore!
For added flair during occasions such as birthday parties or holiday celebrations why not stack several neatly arranged plates filled generously atop dining table inviting guests indulge? This visually appealing setup encourages sharing conversations fostering joyful atmosphere while enjoying scrumptious bites together making cherished memories last longer than mere moments spent enjoying sweet delight itself!
Storage Guidelines
Store leftover cookies in an airtight container at room temperature, away from direct sunlight, to keep them fresh for up to five days. Ensure the container is sealed properly to maintain optimal quality. For longer storage, consider freezing individual portions. Wrap each cookie tightly in plastic wrap, then place them in freezer-safe storage bags. This method preserves their taste and texture for months, allowing you to reheat and enjoy them whenever the craving strikes.
Frozen cookies can be reheated easily, ensuring you always have a delicious treat on hand. Whether enjoyed as a snack, shared with loved ones, or saved for a special occasion, they remain flavorful and satisfying. Sharing homemade cookies creates meaningful moments, fosters connections, and strengthens relationships. The act of baking and sharing these treats reflects warmth, care, and love, bringing people together over simple joys.
Cookies are more than just a sweet indulgence—they symbolize kindness and the effort put into creating something delightful for others. Each bite offers an opportunity to savor life’s small pleasures and build cherished memories. From family gatherings to thoughtful gifts, these treats can inspire joy and connection, reminding us of the importance of sharing and celebrating together. Preserve them thoughtfully, and let their delightful flavors bring smiles and warmth to everyone around you.
Mistakes to avoid
When making Nutella-Stuffed Chocolate Chip Cookies, it’s essential to steer clear of several common mistakes that can ruin your baking experience. First, using cold butter can lead to cookies that spread too much or do not hold their shape. Always use room temperature butter to achieve a creamy texture and ensure that your cookies bake evenly.
Another common error involves overmixing the dough. When you add flour, mix just until combined. Overmixing can result in tough cookies rather than the chewy texture you desire. It’s vital to fold in the chocolate chips gently to retain a soft and tender cookie.
Not chilling the dough is another mistake bakers often make. Chilling your cookie dough for at least 30 minutes helps solidify the fat in your cookies, resulting in a thicker and more flavorful end product. If you skip this step, your cookies may spread too thin during baking.
Using expired ingredients like baking soda or flour can also lead to disappointing results. Always check the expiration dates on all your ingredients before starting your recipe to ensure freshness and effectiveness.
Finally, baking at the wrong temperature can cause uneven cooking. Using an oven thermometer is an excellent way to confirm that your oven’s temperature is accurate. Baking at too high or low a temperature can lead to burnt edges or undercooked centers, ruining your Nutella-Stuffed Chocolate Chip Cookies.
Tips and tricks
To create perfect Nutella-Stuffed Chocolate Chip Cookies, consider implementing some useful tips and tricks into your baking routine. First, choose high-quality chocolate chips for the best flavor. Semi-sweet chocolate pairs beautifully with Nutella’s rich taste, creating a delightful balance that enhances each bite.
Next, consider using a cookie scoop for portioning out your dough. This method ensures uniformity in size and allows for even baking. When each cookie is similar in size, they will bake at the same rate, reducing the chance of some being overcooked while others remain raw.
Another helpful tip is to fill your cookies with Nutella before chilling the dough. This technique allows the filling to become firmer and less likely to leak out during baking. To do this effectively, divide your dough into equal portions and flatten them slightly before adding a dollop of Nutella in the center.
Don’t forget about parchment paper! Lining your baking sheets with parchment paper prevents sticking and makes cleanup easier. It also helps achieve a perfectly baked bottom without burning.
Finally, let your cookies cool on the sheets for a few minutes before transferring them to wire racks. This step allows them time to set up properly while still warm, ensuring they maintain their soft and gooey interior.
Suggestions for Nutella-Stuffed Chocolate Chip Cookies
When preparing Nutella-Stuffed Chocolate Chip Cookies, there are several suggestions that can elevate your recipe further. First, experiment with different types of chocolate chips or chunks—dark chocolate or milk chocolate varieties offer distinct flavors that complement Nutella beautifully.
Consider adding sea salt on top of each cookie before baking for an extra flavor dimension. The contrast between sweet and salty enhances the overall taste experience and makes every bite irresistible.
If you’re feeling adventurous, try adding nuts like chopped hazelnuts or pecans into the mix for added crunchiness and nuttiness that pairs well with Nutella’s flavor profile. These additions provide texture while enhancing flavor complexity.
Additionally, try incorporating vanilla extract into your dough mixture if you haven’t already done so; it adds depth without overpowering other flavors present in the cookies.
Lastly, if you have leftover cookie dough after baking (which is rare), consider freezing it! Portion individual dough balls onto a tray lined with parchment paper and freeze them until solid before transferring them into freezer bags for later use—this way; you’ll always have cookie dough ready whenever cravings strike!
FAQs
How do I store Nutella-Stuffed Chocolate Chip Cookies?
Storing Nutella-Stuffed Chocolate Chip Cookies is simple! Allow them to cool completely after baking before placing them in an airtight container at room temperature. They will stay fresh for about one week this way. If you prefer longer storage options, consider freezing them! Place cooled cookies in freezer-safe bags or containers separated by parchment paper so they don’t stick together—frozen cookies can last up to three months!
Can I use homemade Nutella for these cookies?
Absolutely! Using homemade Nutella adds a personal touch and unique flavor profile to your cookies. Just ensure that it has a similar consistency as store-bought versions; otherwise, it may affect how well it holds up during baking! Homemade spreads typically work great when filled inside these delicious treats!
What should I do if my cookie dough is too sticky?
If you find yourself dealing with overly sticky cookie dough while making Nutella-Stuffed Chocolate Chip Cookies don’t worry! Start by adding small amounts of flour gradually until achieving desired consistency—too much added flour might alter texture so proceed cautiously! Alternatively refrigerate dough briefly (about 20 minutes); chill time allows fats within ingredients firm up making handling easier!
Can I substitute other fillings besides Nutella?
Certainly! If you’re not keen on using traditional hazelnut spread like Nutella feel free experimenting with various fillings such as peanut butter or caramel sauce—creative combinations could yield delightful surprises! Just remember those alternatives should ideally have similar viscosity levels as nut spreads so they won’t leak profusely during baking process!
Are there any gluten-free options available for this recipe?
Yes indeed! You can easily adapt this recipe into gluten-free version by simply swapping all-purpose flour with gluten-free flour blends available commercially—for best results choose blends specifically designed for baking purposes which usually contain xanthan gum aiding structure & texture retention throughout process!
What’s the best way to reheat leftover cookies?
Reheating leftover Nutella-Stuffed Chocolate Chip Cookies requires care ensuring they remain soft without becoming overly dry! Preheat oven slightly lower than original baking temperature around 300°F (150°C). Place cookies onto lined baking sheet warm up approximately 5-10 minutes depending on thickness—microwaving also works but be cautious not overdo it; heat only 10-15 seconds intervals checking frequently till warmed through!
Conclusion
In conclusion, mastering Nutella-Stuffed Chocolate Chip Cookies requires attention to detail while avoiding common pitfalls associated with their preparation. By steering clear of mistakes such as using cold butter or neglecting proper chilling time ensures success every time you bake these delicious treats.
Utilizing tips like choosing high-quality chocolate chips and portioning equal sizes helps create uniformity leading smoother bakes consistently yielding delectable outcomes worth sharing among friends & family alike!
Additionally exploring various suggestions enriches flavors elevating experiences beyond typical expectations allowing everyone enjoy intriguing twists moments indulging their sweet tooth needs!
Lastly addressing any queries surrounding storage methods reheating techniques gives confidence tackling challenges enhancing overall enjoyment journey through delightful world homemade baked goods bringing comfort joy throughout life’s celebrations big small alike!


