Introduction
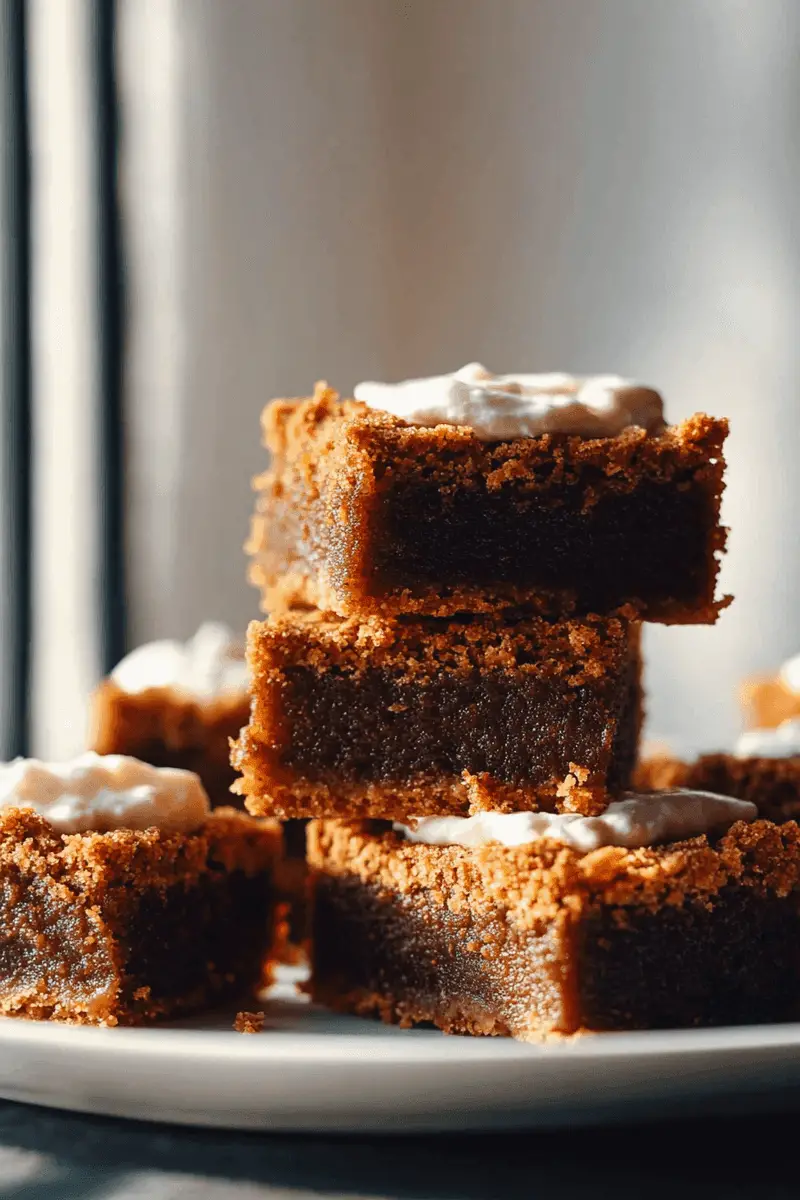
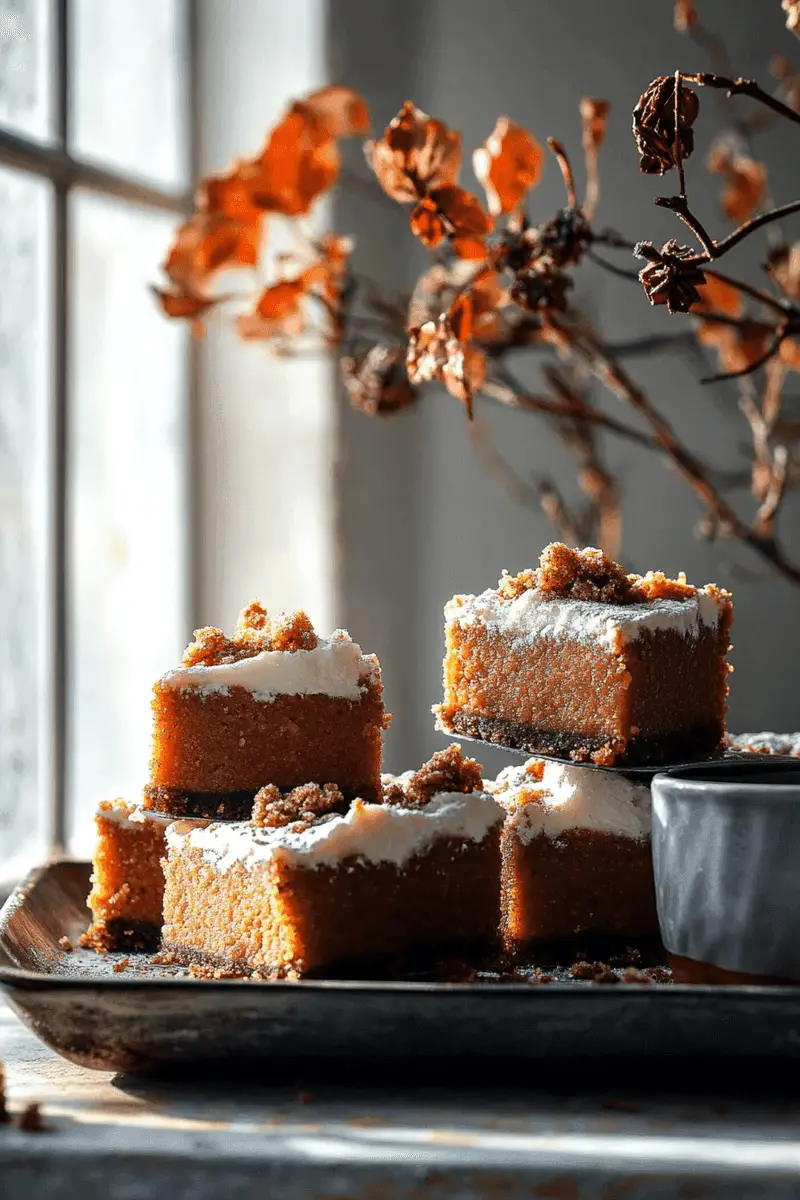
As the leaves change colors and the aroma of cinnamon fills the air, it’s time to indulge in one of the best autumn treats: Gingersnap Pumpkin Pie Bars. These delightful bars combine the robust flavors of gingersnap cookies with creamy pumpkin filling, delivering a dessert that is both comforting and festive. Picture biting into a soft, spiced crust topped with smooth pumpkin goodness—it’s pure bliss!
The beauty of Gingersnap Pumpkin Pie Bars lies not only in their taste but also in their simplicity. This recipe is straightforward enough for novice bakers while still impressing seasoned chefs. The combination of warming spices enhances the richness of the pumpkin, making each bite a memorable experience. Whether you’re hosting a holiday gathering or just craving something sweet on a chilly evening, these bars are sure to become a staple in your dessert repertoire.
In this article, we will guide you through everything you need to know to make these scrumptious Gingersnap Pumpkin Pie Bars from scratch. From selecting the right ingredients to perfecting your baking technique, you’ll find all the details you need to create a dessert that delights everyone at your table. So grab your apron and let’s dive into this delicious fall treat!
Main Ingredients
Gingersnap Cookies
To achieve that irresistible crust for your Gingersnap Pumpkin Pie Bars, start with about 2 cups of crushed gingersnap cookies. These cookies bring a warm spiciness that pairs perfectly with the sweetness of pumpkin puree. Look for high-quality gingersnaps; they should be crispy yet flavorful. If you can’t find pre-made cookies, homemade ones work just as well! Just ensure they are finely crushed so they can form an even base when mixed with butter.
Unsalted Butter
You’ll need 1/2 cup (or one stick) of unsalted butter for this recipe. Unsalted butter allows you to control the overall saltiness of your dish better than salted butter would. Make sure it’s softened at room temperature before mixing it with the cookie crumbs; this will help create a cohesive crust that holds its shape when baked.
Pumpkin Puree
Use 1 cup of pure canned pumpkin puree for filling these delicious bars. Avoid pumpkin pie filling as it contains added sugars and spices which can disrupt our flavor balance here. Canned pumpkin is convenient and ensures consistent flavor throughout your dessert, providing that classic fall taste we all love.
Eggs
Two large eggs are essential for binding all ingredients together in our filling mixture. Eggs lend structure and moisture to our bars while contributing to their creamy texture. Be sure to let them reach room temperature before adding them to achieve optimal results.
Brown Sugar
You’ll require 3/4 cup of packed light brown sugar for sweetness and depth in flavor. The molasses content in brown sugar enhances the spice notes from the gingersnap cookies while adding richness to our filling. If desired, you can substitute darker brown sugar for an even more pronounced caramel-like flavor.
Heavy Cream
A touch of heavy cream (1/2 cup) enriches our filling and gives it a velvety texture when baked. This ingredient elevates our Gingersnap Pumpkin Pie Bars from ordinary to extraordinary by making them luscious without being overly heavy.
Spices
Lastly, gather up 1 teaspoon each of ground cinnamon and ground ginger along with 1/4 teaspoon of ground nutmeg and cloves for extra warmth and fragrance in every bite! Feel free to adjust these spices according to personal preference—after all, each autumn kitchen has its own signature blend!
How to Prepare Gingersnap Pumpkin Pie Bars
Step 1: Preheat Your Oven
Start by preheating your oven to 350°F (175°C). Preheating is crucial because it ensures even baking right from the start; starting with a hot oven helps set the structure of your bars quickly while keeping them moist inside.
Step 2: Prepare Your Baking Dish
Next, line an 8×8-inch baking dish with parchment paper or lightly grease it using non-stick spray or butter. Leaving some overhang on two sides will make it easier to lift out your finished bars later on! This simple step guarantees easy removal after baking while ensuring minimal cleanup afterward—what’s not to love?
Step 3: Make The Crust
In a medium bowl, mix together crushed gingersnaps and melted unsalted butter until fully combined—this mixture should resemble wet sand! Press this mixture firmly into the bottom of prepared baking dish using either clean hands or back of measuring cup until evenly distributed across surface area. Bake this crust alone for approximately 10 minutes until fragrant but not browned—let cool slightly before continuing!
Step 4: Combine Filling Ingredients
While crust cools down slightly whisk together pumpkin puree along with brown sugar until smooth then add eggs one at a time mixing thoroughly after each addition followed by vanilla extract too! Finally stir in spices along heavy cream until well blended—this creates a luscious filling ready for our baked crust!
Step 5: Bake The Bars
Pour this delightful mixture directly over cooled gingersnap crust spreading evenly then place back into preheated oven! Bake for about 30-35 minutes until edges appear set while center remains slightly jiggly—it will firm up as it cools down later! Keep an eye toward last few minutes ensuring no overbaking occurs!
Step 6: Cool And Chill
Once baked remove from oven allowing them time cool completely at room temperature before transferring them into refrigerator! Chilling enhances flavors allowing everything meld together beautifully creating those perfect slices later on—aiming for at least two hours minimum before cutting into squares!

Serving and Storing Tips
Serving Suggestions
To serve your Gingersnap Pumpkin Pie Bars beautifully cut them into squares or rectangles using a sharp knife rinsed between cuts—you’ll want clean edges! Consider topping each piece off with freshly whipped cream sprinkled lightly with cinnamon or nutmeg which adds an elegant finish alongside added texture contrast too! Pairing these bars alongside coffee or apple cider complements their flavors brilliantly offering guests delightful options during gatherings!
Storing Leftovers
If you have any leftovers (a rare occurrence!), store them covered tightly in an airtight container within refrigerator where they’ll stay fresh up-to five days maximum! Alternatively freezing individual portions works well too; wrap tightly first then place inside freezer-safe bags keeping handy treats available anytime cravings hit later on down road!
By following these tips closely you’ll ensure optimal enjoyment out-of-every-bite whether served warm chilled or frozen allowing everyone savor seasonal delight known as Gingersnap Pumpkin Pie Bars whenever desires arise!
Mistakes to avoid
One common mistake when making Gingersnap Pumpkin Pie Bars is using the wrong type of pumpkin. Many people opt for fresh pumpkin, which can be watery and affect the texture of the bars. Instead, it’s best to use canned pumpkin puree. This provides a consistent texture and flavor that will enhance your bars.
Another mistake is not measuring ingredients accurately. Baking is a science; even small deviations can lead to significant issues. Always use proper measuring cups and spoons, especially for dry ingredients like flour and spices. Weighing your ingredients can also ensure accuracy, giving you perfect results every time.
Don’t forget about the gingersnap crust! Many bakers skip this step or use a store-bought version that lacks flavor. Making your own gingersnap crust adds depth to the dish. Simply crush gingersnap cookies and combine them with melted butter for a delicious base.
Additionally, overbaking is a frequent error. Gingersnap Pumpkin Pie Bars should be slightly firm in the center but still jiggly when you remove them from the oven. Overbaking can lead to dry bars that lack the creamy consistency you desire. Use a toothpick to check for doneness; it should come out with just a few moist crumbs.
Lastly, failing to let the bars cool completely before slicing is another mistake. Warm bars may crumble easily and lose their shape. Allow them to cool in the pan at room temperature before transferring them to the fridge for at least two hours. This will help set them properly and make cutting easier.
Tips and tricks
For perfect Gingersnap Pumpkin Pie Bars, start by preheating your oven adequately. An oven that isn’t hot enough can lead to uneven baking, affecting both texture and taste. Make sure your oven reaches the desired temperature before placing your bars inside.
Use room-temperature ingredients whenever possible, particularly eggs and cream cheese if included in your recipe. This helps the ingredients blend more smoothly and creates a better overall texture in your pie bars.
When making the filling, whisk together all wet ingredients thoroughly before mixing in dry ones. This ensures that spices like cinnamon or nutmeg are evenly distributed throughout your filling, enhancing its flavor profile significantly.
Incorporate spices thoughtfully for an extra flavor boost in your Gingersnap Pumpkin Pie Bars. Besides classic pumpkin pie spices like cinnamon and nutmeg, consider adding ginger or allspice to intensify those warm flavors characteristic of fall desserts.
Consider garnishing with whipped cream or a sprinkle of crushed gingersnaps once baked and cooled for added visual appeal and taste contrast. A dollop of freshly whipped cream enhances richness while allowing the spices to shine through.
Lastly, experiment with different toppings or add-ins like chopped pecans or walnuts for extra crunch in your gingersnap crust or filling. These elements add texture and complexity, elevating simple pumpkin pie bars into an unforgettable dessert experience.
Suggestions for Gingersnap Pumpkin Pie Bars
Choosing high-quality gingersnap cookies will dramatically improve your Gingersnap Pumpkin Pie Bars’ flavor profile. Look for brands that use natural ingredients without preservatives or artificial flavors; this choice makes a noticeable difference in taste.
If you’re feeling adventurous, try adding chocolate chips into the filling mix! The combination of rich chocolate with spiced pumpkin creates a decadent treat that everyone will love, allowing you to customize these bars according to personal preferences.
For a healthier twist on this classic dessert, consider substituting some of the sugar with natural sweeteners like maple syrup or honey. You can experiment with reducing refined sugars while still achieving sweetness without compromising flavor or texture significantly.
Consider scaling up your recipe if you’re hosting an event! Doubling or tripling this recipe works well since these bars freeze beautifully; simply layer them between parchment paper in an airtight container for future enjoyment without losing quality.
When serving these delicious Gingersnap Pumpkin Pie Bars at gatherings, cut them into smaller portions so guests can enjoy samples without feeling overwhelmed by dessert sizes! Smaller pieces allow everyone to indulge while keeping portion control manageable—a win-win situation!
Lastly, don’t hesitate to pair these delicious bars with beverages! Serve alongside coffee, tea, or even spiced cider during fall festivities for an enhanced tasting experience that complements their flavors perfectly.

FAQs
What is the best way to store Gingersnap Pumpkin Pie Bars?
To keep your Gingersnap Pumpkin Pie Bars fresh, store them in an airtight container in the refrigerator. They stay good for up to one week when properly stored. For longer storage options, consider freezing individual portions wrapped tightly in plastic wrap followed by foil; they will maintain quality for up to three months!
Can I use homemade pumpkin puree instead of canned?
Yes! You can definitely use homemade pumpkin puree instead of canned for Gingersnap Pumpkin Pie Bars; however, ensure it’s appropriately cooked down until thickened enough so that excess moisture doesn’t interfere with bar consistency during baking.
How long do Gingersnap Pumpkin Pie Bars need to cool before serving?
It’s essential first to let your Gingersnap Pumpkin Pie Bars cool completely after removing from heat—approximately two hours at room temperature followed by chilling them further in the fridge (ideally overnight). This cooling process helps set their structure properly before slicing into squares!
Can I add nuts into my Gingersnap Pumpkin Pie Bars?
Absolutely! Feel free to incorporate chopped nuts such as pecans or walnuts into either the crust mixture or blended throughout filling itself when preparing these delectable treats—this addition gives extra crunchiness while complementing spice flavors beautifully!
Is there a gluten-free version available?
Yes! To make gluten-free Gingersnap Pumpkin Pie Bars simply substitute regular gingersnap cookies with gluten-free alternatives available on market shelves today; additionally replace all-purpose flour used within recipes accordingly ensuring no cross-contamination occurs during preparation steps if necessary!
What should I serve alongside my Gingersnap Pumpkin Pie Bars?
These delicious treats pair wonderfully with various beverages including coffee (hot/cold), tea (green/black), warm apple cider spiced up nicely too—adding complimentary flavors elevates overall enjoyment factor enhancing delightful taste experience guests won’t soon forget!
Conclusion
In summary, making delectable Gingersnap Pumpkin Pie Bars requires attention to detail while avoiding common pitfalls that could ruin their texture and flavor profile. By utilizing canned pumpkin puree instead of fresh pumpkins ensures consistent quality throughout every bite! Remember always measure accurately using proper tools—this consistency leads directly toward success when baking any dessert recipe!
Implementing tips such as preheating ovens correctly while incorporating spices thoughtfully can take these treats from ordinary desserts into extraordinary culinary experiences loved by all who try them! Additionally exploring unique suggestions around ingredient swaps allows creativity flourish within kitchen realms yielding memorable results worth sharing amongst friends family alike!
Finally don’t forget about proper storage techniques preserving freshness ensuring indulgence remains enjoyable long after initial preparation efforts have concluded—after all nothing compares enjoying homemade sweetness anytime cravings arise! Indulge guilt-free knowing each bite brings forth delightful essence characteristic seasonal favorites perfect for sharing special occasions gatherings year-round.
