Introduction and Quick Summary
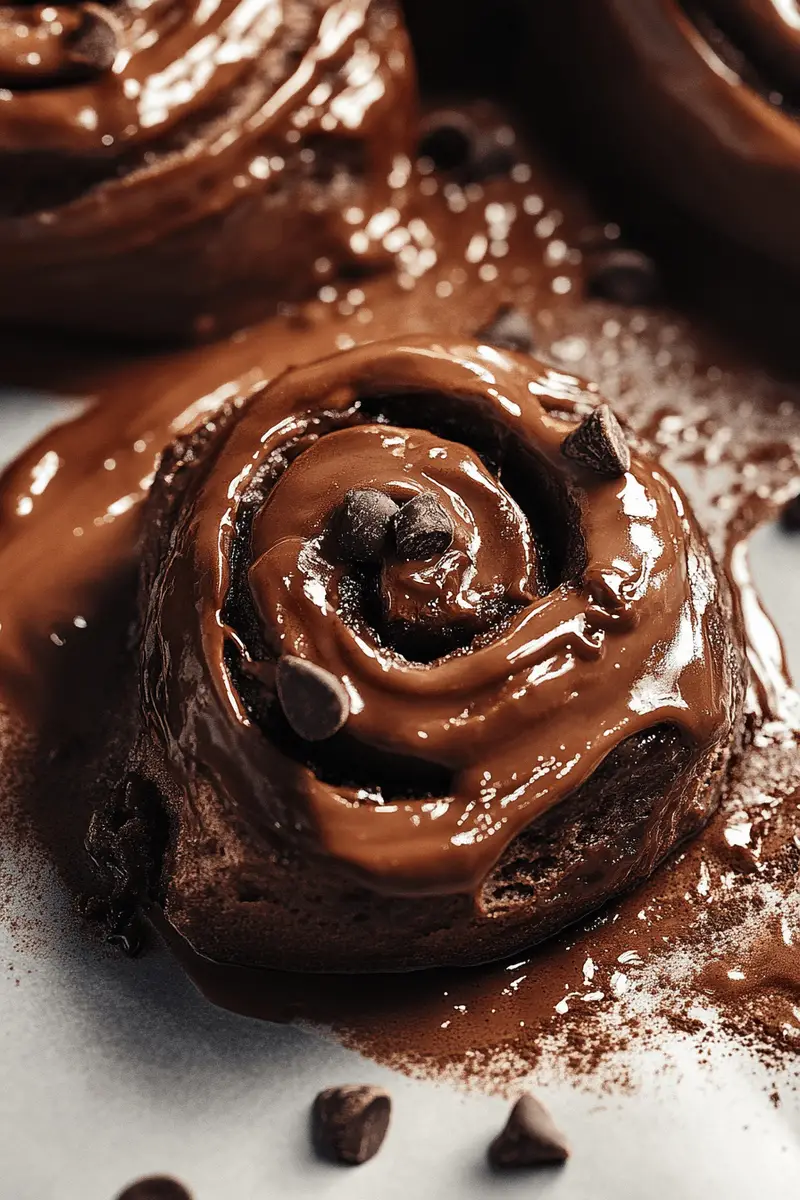
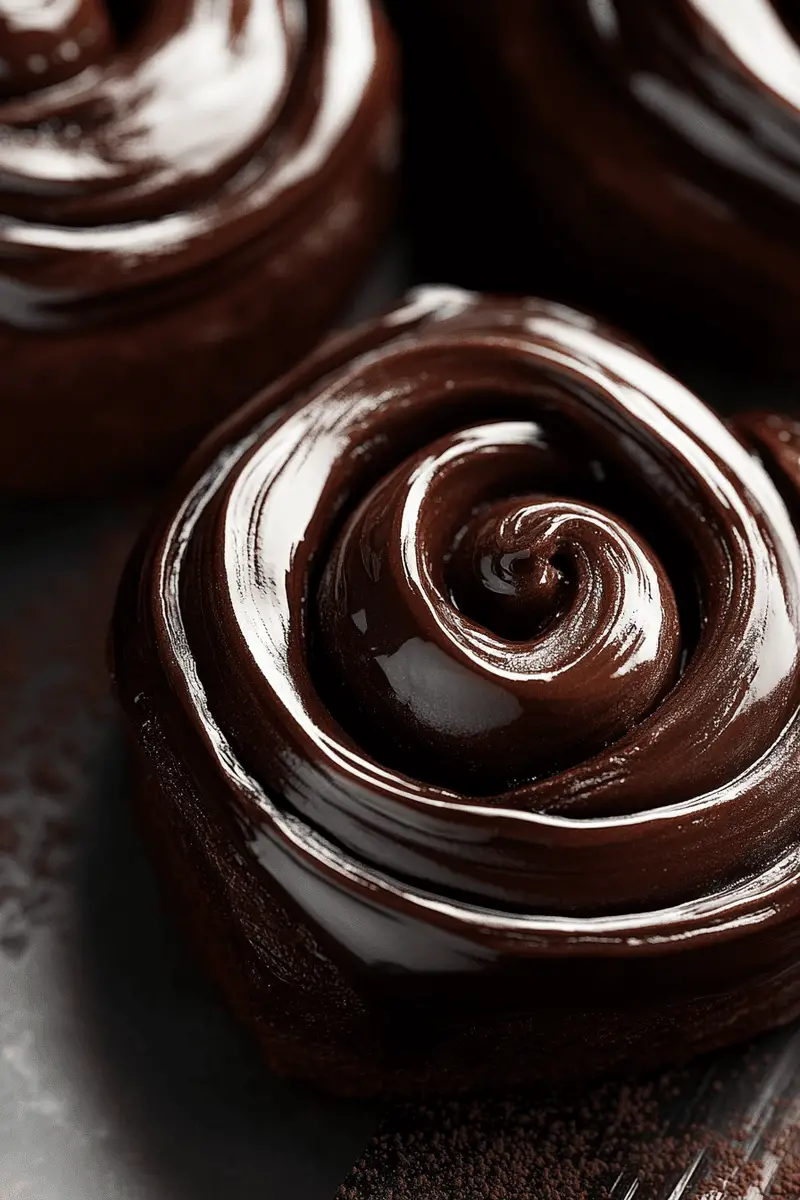
Chocolate cinnamon rolls are the ultimate indulgence for any sweet tooth. Imagine soft, fluffy dough swirled with rich chocolate and a hint of warm spices, all drizzled with a creamy icing. This delightful recipe will guide you through making these delectable treats from scratch. Not only do they taste heavenly, but they also fill your kitchen with an irresistible aroma that will have everyone asking for more.
Whether you’re preparing a special breakfast for family or inviting friends over for brunch, these chocolate cinnamon rolls are sure to impress. They combine the beloved flavors of classic cinnamon rolls with the luxurious richness of chocolate. You can enjoy them fresh out of the oven or save some for later; either way, they won’t last long!
In this article, we’ll cover everything you need to know about creating the perfect batch of chocolate cinnamon rolls. From gathering ingredients to detailed step-by-step instructions on how to prepare them and tips on serving and storing your delicious creations. Get ready to embark on a baking adventure that ends with a scrumptious reward!
Main Ingredients
All-Purpose Flour
All-purpose flour is the backbone of this recipe and provides the structure needed for your rolls. You’ll need about 4 cups to create a dough that’s both soft and sturdy enough to hold all that delicious filling. The gluten content in all-purpose flour is ideal for achieving the perfect rise while keeping the texture light and airy.
Granulated Sugar
Sugar is crucial not only for sweetness but also for activating the yeast in your dough. Use around 1/2 cup of granulated sugar in your recipe. This amount balances perfectly with the chocolate and spices, ensuring your chocolate cinnamon rolls are not overly sweet but still satisfyingly rich.
Active Dry Yeast
Yeast is what makes these rolls rise and gives them that fluffy texture we all love. You will need 2 packets (or about 4 1/2 teaspoons) of active dry yeast. Make sure to proof it properly before adding it to your dough mixture; this step ensures that your rolls will be light and fluffy.
Whole Milk
Whole milk adds moisture to your dough, contributing to its softness and flavor. Approximately 1 cup of warmed whole milk helps activate the yeast while also enriching the overall taste profile of your chocolate cinnamon rolls.
Unsalted Butter
Butter enhances the flavor and texture of your dough significantly. You’ll need about 1/3 cup of unsalted butter melted into your mixture as you prepare it. Using unsalted butter allows you to control the saltiness in your recipe better.
Cocoa Powder
Cocoa powder brings that rich chocolate flavor which is essential in our chocolate cinnamon rolls. About 1/2 cup should be sufficient to create a deliciously chocolaty filling without overpowering the traditional cinnamon flavors.
Ground Cinnamon
Ground cinnamon adds warmth and spice, complementing the sweetness of both sugar and chocolate beautifully. Use around 2 teaspoons of ground cinnamon mixed into the filling for that classic taste that pairs so well with chocolate.
Brown Sugar
Brown sugar gives an additional depth of flavor due to its molasses content. Using about 1/4 cup creates a lovely caramel-like sweetness in each bite of your roll.
Eggs
Eggs act as binders in our dough recipe while adding richness as well. Including one large egg will help improve the overall texture and moisture level of your final product.
Cream Cheese (for Icing)
For topping off these delectable rolls, cream cheese icing provides a tangy contrast against their sweetness. You’ll need around 8 ounces softened cream cheese combined with powdered sugar to drizzle over once baked.

How to Prepare Chocolate Cinnamon Rolls
Step One: Prepare Your Dough
Start by warming up one cup of whole milk until it’s just hot but not boiling (around 110°F). In a small bowl, mix together two packets (about 4 1/2 teaspoons) of active dry yeast with the warm milk along with half a cup of granulated sugar. Allow this mixture to sit undisturbed for about five minutes until it becomes frothy; this indicates that your yeast is activated properly.
In another large mixing bowl, combine four cups of all-purpose flour along with one teaspoon of salt and mix thoroughly using a whisk or spoon until evenly distributed throughout the flour. Create a well in the center where you’ll add in melted unsalted butter (1/3 cup), eggs (one large), and finally pour in your frothy yeast mixture from earlier.
Now it’s time to bring everything together! Mix all components gently using either an electric mixer fitted with a dough hook attachment or simply by hand until everything forms into a shaggy ball—this process may take several minutes if done by hand as you want to develop gluten structure within those flours!
Once combined into cohesive dough form turn it out onto lightly floured surface then knead it gently—about five minutes should suffice—until smooth elastic texture forms before placing back into greased bowl covering tightly using plastic wrap allowing rising process take place at room temperature approximately one hour or until doubled size achieved!
Step Two: Roll Out Your Dough
After allowing ample time for rising purposes remove plastic wrap off risen dough gently punch down air bubbles formed during process then turn back onto floured surface once again rolling out into rectangle shape measuring roughly eighteen inches long by twelve inches wide—aiming thickness close half inch throughout entire area ensuring even distribution across board!
Next sprinkle cocoa powder generously over entire surface followed by two teaspoons ground cinnamon spread evenly across top layer too ensuring every bite comes packed full flavor! Now sprinkle brown sugar atop mixture creating delightful crunch when baked while simultaneously providing additional sweetness incorporated throughout layers seamlessly blending all flavors harmoniously together perfectly balanced within treat itself!
Finally take time here folding sides inward slightly overlapping edges slightly press down firmly sealing tight before rolling tightly starting from one end toward opposite end forming long cylinder shape carefully maintaining consistency throughout entire length then pinch seams closed securely avoiding spillage during baking times ahead ahead!
Step Three: Slice & Bake
Using sharp knife slice cylinder into equal parts approximately one inch thick—it’s important not skip this step as even sizing ensures uniform cooking translates directly deliciousness yields! Place slices cut side up within greased baking dish leaving sufficient space between each piece allowing expansion during bake time yielding beautifully golden brown tops upon finish line!
Preheat oven set temperature around three hundred seventy-five degrees Fahrenheit while letting prepared pan rest waiting patiently fifteen minutes—this allows residual heat keep rising action occurring naturally elevating height growth within baked goods themselves!
Once preheated slide tray inside oven allow baking continue thirty-five forty minutes until lightly browned atop checking internal temperatures reaching safe zone at least one hundred ninety degrees Fahrenheit confirming doneness throughout entirely before removing completing visual appeal garnishing look worthy presentation serve guests family alike enjoying flavorsome bites alongside steaming coffee tea beverages contributing overall experience memorable moments shared together fondly forever cherished memories created!

Serving and Storing Tips
Serving Suggestions
When serving homemade chocolate cinnamon rolls consider pairing them alongside various breakfast items such as fresh fruit salads creamy yogurt parfaits offering diverse options catering everyone preferences tastes! For elegant touch feel free drizzle melted semi-sweet chocolates atop cooled pastries resulting visually stunning display delightfully decadent taste promised each bite taken!
Additionally consider offering whipped cream dollops alongside generous servings vanilla ice cream creating indulgent dessert experience enjoyed evening gatherings special occasions alike providing truly unforgettable treat pleasing every palate indulging desires cravings fulfilled completely satisfied leaving lasting impressions hearts minds alike yearning more next time round!
Storing Leftovers
If there happen be any leftover treats don’t fret—they’re simple store correctly ensuring freshness maintained prolong enjoyment longer! Simply wait until cooled completely before transferring airtight containers refrigerate maximum three days retain quality without sacrificing original textures flavors experienced first day enjoyed freshly baked! Alternatively freezing portions possible guaranteeing indulging anytime desired simply wrap tightly foil freezer-safe bags placing deep freeze remaining good up month keeping decadently delightful essence intact every moment savoring treat later down line whenever mood strikes craving something sweet comforting warmth enveloped within perfect pastry creation made from scratch always ready go when hunger calls!
Follow these guidelines carefully ensure every element brought forth beautifully executed resulting successful venture producing irresistibly scrumptious yield worth effort put forth delighted satisfaction guaranteed through each mouthwatering piece savored thoroughly celebrating joy shared among loved ones gathered together sharing laughter love blissful indulgences derived simple pleasures life found within kitchen home nourished hearts souls through flavorful experiences crafted lovingly hands-on culinary adventures undertaken together making magic happen right there amidst family friends surrounding us always creating lasting bonds forged memories built around food shared moments treasured deeply forevermore!
Mistakes to avoid:
One common mistake when making Chocolate Cinnamon Rolls is not properly measuring the ingredients. Accurate measurements are crucial in baking, as they can significantly affect the texture and taste of your rolls. For instance, using too much flour can lead to dense and dry rolls, while too little can make them overly sticky. Always use a kitchen scale for precise measurements, or at least ensure you spoon the flour into your measuring cup and level it off with a knife.
Another frequent error is skipping the proofing step. Proofing allows the dough to rise and develop flavor. If you rush through this process, your rolls will not be as fluffy and may lack the rich flavor that comes from fermentation. Make sure to give your dough adequate time to rise in a warm environment until it doubles in size. Patience is key to achieving those delightful layers in your Chocolate Cinnamon Rolls.
A third mistake is overbaking the rolls. Keep a close eye on them towards the end of the baking time. Overbaked Chocolate Cinnamon Rolls can become tough and lose their delightful gooeyness. Use a toothpick or skewer inserted in the center to check for doneness; it should come out clean but not dry. Baking times can vary based on individual ovens, so rely on visual cues as well.
Lastly, failing to let the rolls cool before frosting them is a common pitfall. Applying icing while they are still hot can cause it to melt and run off, resulting in less flavorful rolls. Allow your Chocolate Cinnamon Rolls to cool for about 10-15 minutes before adding any glaze or icing for maximum flavor retention.
Tips and tricks:
To achieve perfect Chocolate Cinnamon Rolls, start with high-quality ingredients. Fresh yeast is essential for a good rise; using expired yeast will lead to disappointing results. Look for active dry yeast stored in a cool, dry place, or even better, purchase from local bakeries where turnover is high.
Consider using bread flour instead of all-purpose flour for a chewier texture. Bread flour has higher protein content which helps create gluten structure in the dough, giving your rolls that desired stretchiness. If you only have all-purpose flour on hand, that will work too; just keep an eye on hydration levels since all-purpose flour absorbs water differently.
When rolling out the dough, aim for an even thickness of about ¼ inch. An uneven roll may result in inconsistent baking, with some sections overdone while others remain undercooked. A rolling pin with guides can help maintain uniformity throughout the process.
Incorporate plenty of chocolate chips or chunks into your filling mixture for extra indulgence. As you spread out your cinnamon-sugar mixture over the rolled-out dough, sprinkle additional chocolate pieces generously throughout to ensure every bite bursts with flavor.
Finally, experiment with different glazes once your Chocolate Cinnamon Rolls are baked and cooled. While classic cream cheese icing is always a hit, consider adding flavors like orange zest or espresso powder for an exciting twist that elevates these rolls from ordinary to extraordinary.
Suggestions for Chocolate Cinnamon Rolls:
Using a stand mixer equipped with a dough hook will streamline your process considerably when making Chocolate Cinnamon Rolls. Mixing by hand can be labor-intensive—especially when working with sticky dough—but a stand mixer takes care of kneading while allowing you more freedom to prepare other ingredients simultaneously.
To enhance flavor complexity in your filling mixture, consider adding spices beyond cinnamon—like nutmeg or cardamom. These spices add depth and complement both chocolate and cinnamon beautifully, creating a deliciously aromatic experience that tantalizes taste buds.
If you’re looking for ways to prepare ahead of time, consider refrigerating your rolled-up dough overnight before baking it the next day. Simply cover it tightly with plastic wrap after rolling up with filling and place it in the fridge; this method allows flavors to meld overnight while saving you precious time on busy mornings!
Additionally, try incorporating nuts such as pecans or walnuts into your filling mixture for added crunch and texture contrast against soft chocolate layers. Roughly chop nuts before sprinkling them along with chocolate chips on top of cinnamon-sugar filling—it adds another layer of flavor!
Lastly, don’t forget presentation! When serving Chocolate Cinnamon Rolls at gatherings or brunches, consider dusting them lightly with powdered sugar right before serving or drizzling additional glaze artistically across each roll—this small touch makes them look as good as they taste!
FAQs:
What makes Chocolate Cinnamon Rolls different from regular cinnamon rolls?
Chocolate Cinnamon Rolls stand out due to their rich filling infused with cocoa powder alongside traditional cinnamon-sugar mixtures. The addition of chocolate creates an irresistible combination that offers both warmth from spices and sweetness from melted chocolate—a delightful twist on classic recipes!
Can I use dark chocolate instead of milk chocolate?
Absolutely! Using dark chocolate adds depth and richness to your Chocolate Cinnamon Rolls while balancing sweetness effectively—this choice caters particularly well if you’re fond of bolder flavors rather than milky notes typically found in milk chocolates.
How do I store leftover Chocolate Cinnamon Rolls?
Leftover Chocolate Cinnamon Rolls should be stored in an airtight container at room temperature for up to three days; if longer storage is needed (upwards of one week), refrigerate them wrapped tightly in plastic wrap—just remember they might lose some moisture over time!
Can I freeze unbaked dough?
Yes! Freezing unbaked dough works wonderfully—after shaping it into rolls but before baking them off! Wrap tightly in plastic wrap followed by foil then store within freezer bags labeled clearly so they are easily identifiable later; simply thaw overnight in fridge before baking fresh!
Can I substitute almond milk for regular milk?
Certainly! Almond milk serves as an excellent alternative during preparation without sacrificing flavor; just ensure it’s unsweetened variety unless you’re aiming for extra sweetness within final product—the key lies within adjusting measurement ratios accordingly during mixing stages.
How long does it take to rise?
Typically allowing two rounds of rising yields best results! First rise usually requires around 1-2 hours until doubled size; second rise occurs after shaping may take another 30-60 minutes depending on ambient temperature—keep patience during these periods leads better final product!
Conclusion:
In conclusion, making delicious Chocolate Cinnamon Rolls involves careful attention to detail—from measuring ingredients accurately to allowing enough time for proofing—the joy lies within gradual processes leading toward exceptional outcomes! Avoid common pitfalls such as overbaking or rushing through steps while embracing helpful tips like using quality ingredients and experimenting with flavors creates unique experiences worth sharing around family tables! Remember preparation techniques matter significantly so take advantage of tools like stand mixers while also incorporating exciting elements into both fillings & presentations ensures every batch remains memorable! Embrace creativity alongside tradition by adding personal touches whether through varied glazes/nuts/spices—all culminating together harmoniously enriches enjoyment from first bite till last crumb finishes disappearing!
Print
Chocolate Cinnamon Rolls
- Total Time: 45 minutes
- Yield: 12 rolls 1x
Description
Soft, fluffy chocolate cinnamon rolls with a rich, gooey filling and a drizzle of luscious glaze. Perfect for breakfast or dessert!
Ingredients
- 3 cups flour
- 1/4 cup cocoa powder
- 2 tsp cinnamon
- 1/4 cup sugar
- 1 cup warm milk
- 2 1/4 tsp active dry yeast
- 1/4 cup melted butter
Filling:
- 1/2 cup brown sugar
- 2 tbsp cocoa powder
- 2 tsp cinnamon
- 2 tbsp softened butter
Instructions
- Mix warm milk, sugar, and yeast. Let it bloom for 5 minutes.
- Combine flour, cocoa powder, and cinnamon. Gradually add yeast mixture and melted butter to form a dough.
- Knead the dough for 5–7 minutes, cover, and let rise for 1 hour.
- Roll out the dough, spread softened butter, and sprinkle the filling mixture evenly.
- Roll the dough tightly, slice into 12 rolls, and arrange in a greased pan.
- Bake at 350°F (175°C) for 25 minutes. Cool slightly before glazing.
Notes
- For extra decadence, drizzle with cream cheese frosting or melted chocolate.
- Store leftovers in an airtight container for up to 3 days.
- Prep Time: 20 minutes
- Cook Time: 25 minutes
Nutrition
- Calories: 210
- Sugar: 12g
- Fat: 7g
- Carbohydrates: 35g
- Fiber: 2g
- Protein: 5g
