Introduction and Quick Summary
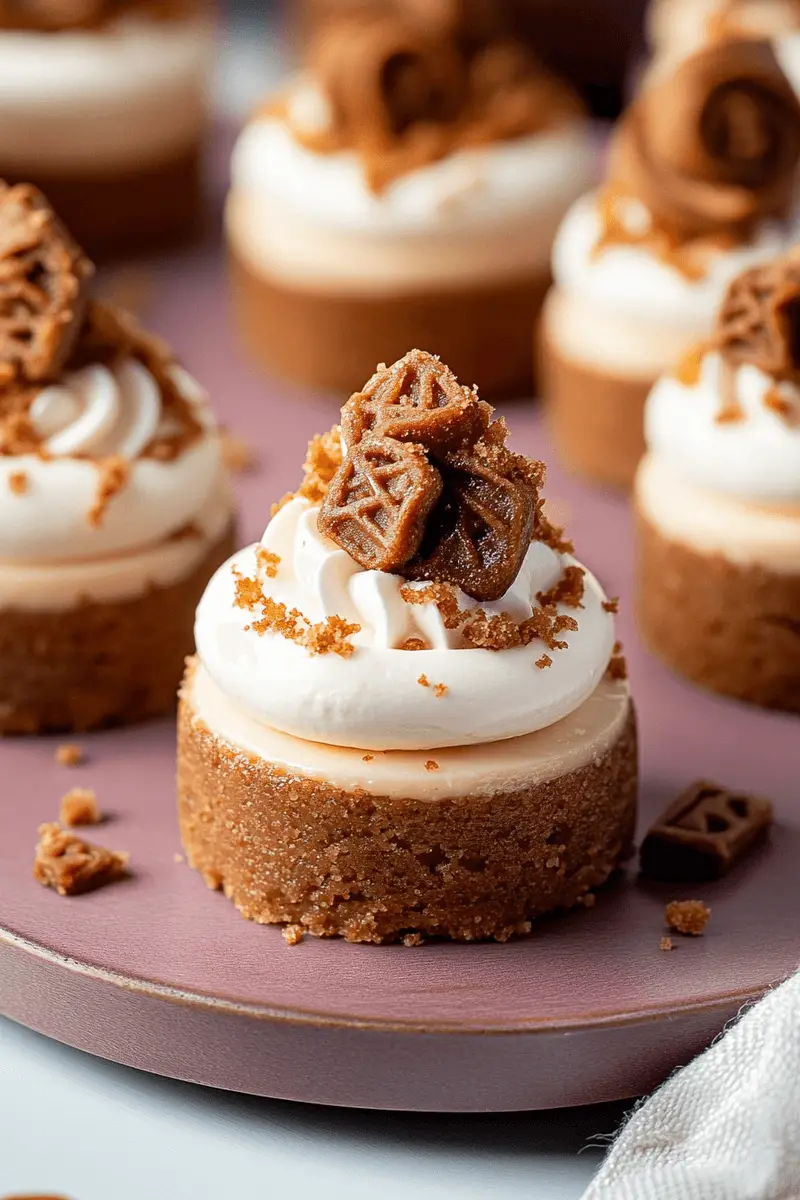
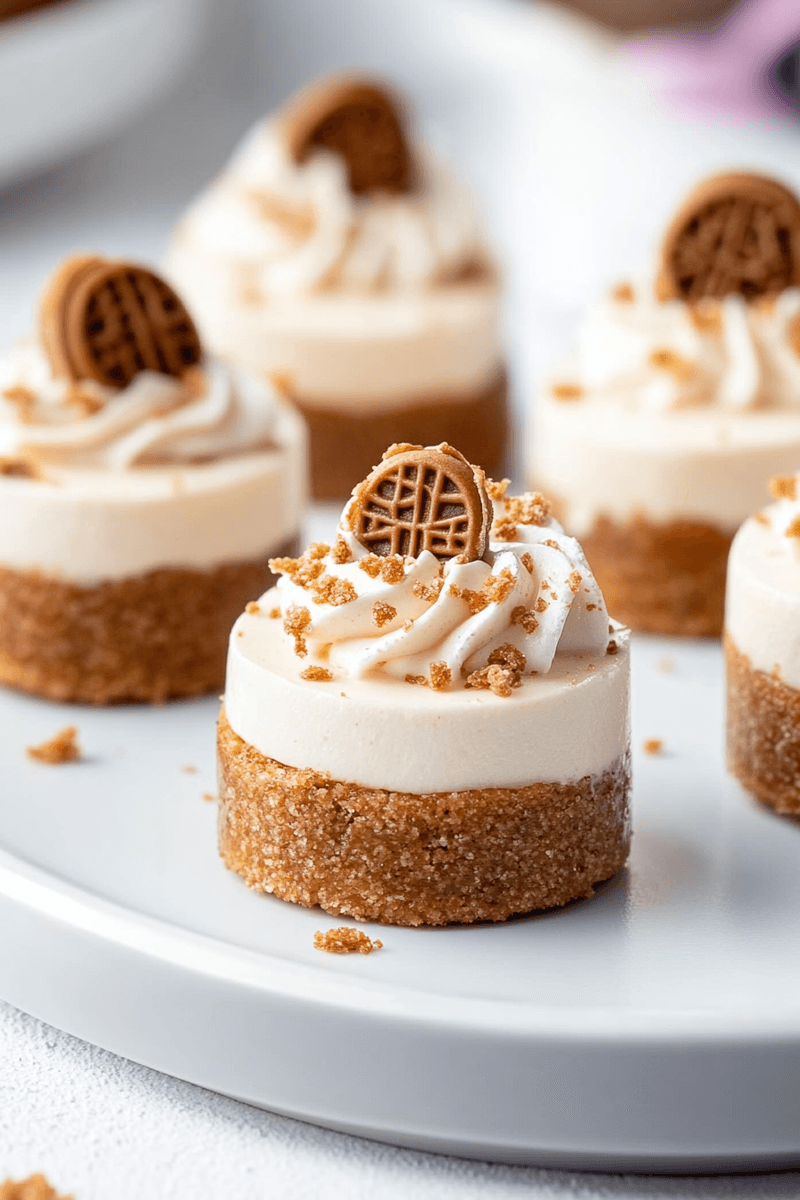
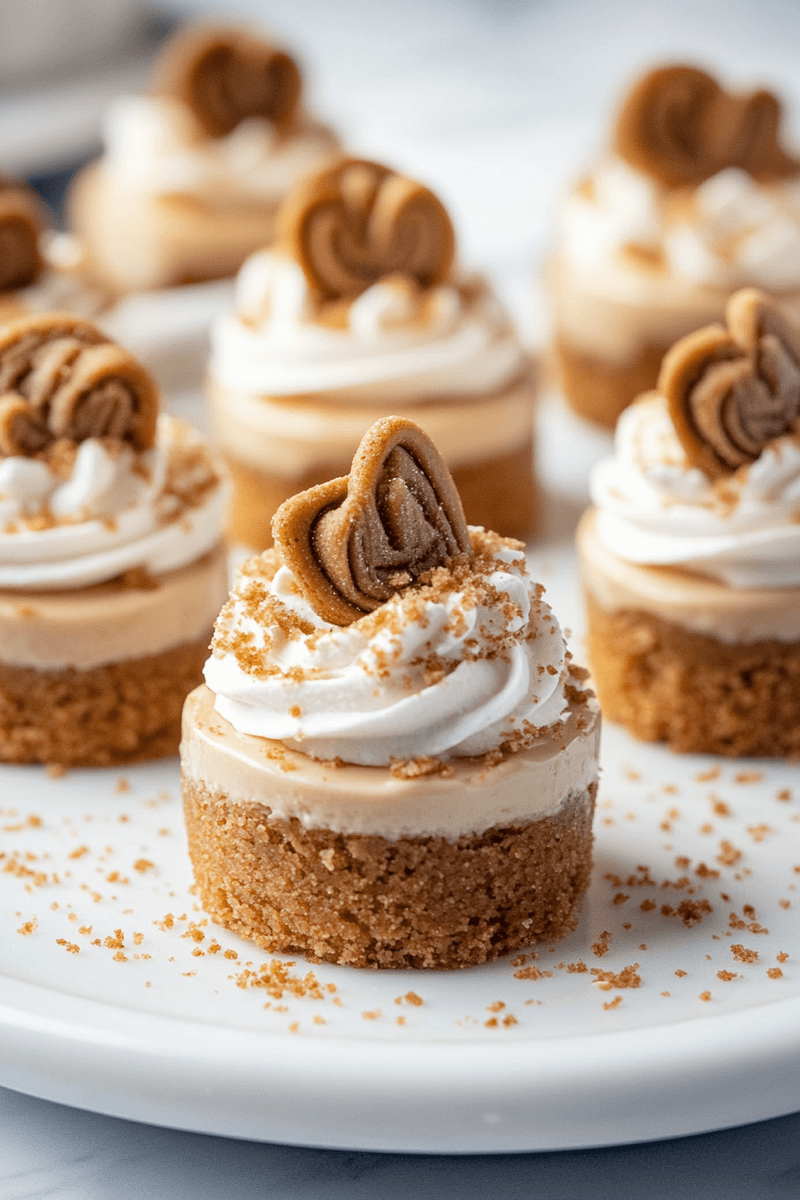
Mini Biscoff Cheesecakes are the ultimate treat for dessert lovers. These bite-sized delights boast a creamy filling that perfectly complements the distinct flavor of Biscoff cookies. If you love the combination of smooth cheesecake and crunchy cookie layers, this recipe is just for you. With an easy-to-follow process and simple ingredients, you can whip up these mini cheesecakes in no time. Perfect for parties or as a delightful snack, these treats are sure to impress your guests.
The beauty of Mini Biscoff Cheesecakes lies not just in their taste but also in their presentation. Each individual serving can be topped with additional crushed cookies or a drizzle of caramel sauce to elevate their visual appeal. They are ideal for any occasion—whether it’s a birthday party, holiday gathering, or simply a cozy night in. The best part? You can prepare them ahead of time and store them in the fridge until you’re ready to serve.
In this article, we will guide you through the essential ingredients needed to create these scrumptious treats. Following that, we will provide detailed instructions so you can master the art of making Mini Biscoff Cheesecakes at home. Additionally, we will share tips on serving and storing these delightful desserts to ensure they remain fresh and tasty. So let’s dive into the world of sweet indulgence with our Mini Biscoff Cheesecake recipe!

Main Ingredients
To create your delicious Mini Biscoff Cheesecakes, you’ll need the following core ingredients:
Cream Cheese
Cream cheese is the star ingredient in any cheesecake recipe. For this dish, use 16 ounces of softened cream cheese for that perfect creamy texture. Make sure it is at room temperature before mixing; otherwise, you’ll end up with lumps instead of a smooth filling. Cream cheese provides the rich base that balances out the sweetness from other components while ensuring each bite melts in your mouth.
Sugar
You’ll need ½ cup of granulated sugar to add sweetness to your cheesecakes. The sugar helps enhance the flavor profile without overpowering the unique taste of the Biscoff cookies. It also contributes to the overall consistency by creating a smooth mixture when combined with cream cheese and other ingredients.
Heavy Whipping Cream
For a light and airy texture in your cheesecakes, incorporate 1 cup of heavy whipping cream into your mixture. Whipping cream adds richness while allowing you to achieve that desired fluffy consistency when whipped properly. Remember to whip it until stiff peaks form for optimal results.
Vanilla Extract
Adding 1 teaspoon of pure vanilla extract elevates the flavor profile of your mini cheesecakes significantly. Vanilla complements the sweetness and provides depth without competing with other flavors present in this dessert.
Biscoff Cookies
Use about 12-15 crushed Biscoff cookies as both crust and topping for these cheesecakes. These spiced caramel-flavored cookies are essential; they give texture and flavor to each layer while adding an irresistible crunch that contrasts beautifully with the creamy filling.
Butter
To bind your crust together perfectly, melt 4 tablespoons (½ stick) of unsalted butter and mix it with crushed Biscoff cookies. The butter not only helps hold everything together but also adds richness that enhances this dessert’s overall flavor.
How to Prepare Mini Biscoff Cheesecakes
Creating Mini Biscoff Cheesecakes involves several straightforward steps:
Prepare Your Crust
Begin by preheating your oven to 350°F (175°C). While it heats up, take a medium-sized mixing bowl and crush about 12-15 Biscoff cookies into fine crumbs using either a food processor or a rolling pin. Once they reach a sandy texture, pour them into another bowl and combine with melted butter until fully mixed together.
Next, line muffin tins with cupcake liners for easy removal later on. Press approximately one tablespoon of the cookie-butter mixture firmly into each liner’s bottom using either your fingers or a small measuring cup—this forms the base crust for your cheesecakes! Place them in the preheated oven for about 5-7 minutes until slightly golden brown then allow them to cool completely on a wire rack before adding any fillings.
Make Your Filling
In another bowl, combine softened cream cheese and sugar using an electric mixer set on medium speed until smooth—approximately 2-3 minutes should suffice! Scrape down sides regularly so everything blends evenly without lumps remaining afterward! Afterward add heavy whipping cream slowly while continuing mixing until well incorporated; then add vanilla extract right after that too!
Once mixed thoroughly turn off mixer then gently fold in any remaining crushed cookies if desired—this adds extra texture throughout each bite! Now spoon equal portions into cooled crusts carefully so as not too disturb layers below! Smooth tops out gently then refrigerate cheesecakes at least four hours (or overnight) so they set properly before serving!
Garnish Ahead Of Serving
Once your mini cheesecakes have set adequately after refrigeration time has passed—it’s time for garnishing! Remove them from muffin tins by gently peeling away paper liners carefully ensuring intact shapes remain intact during process too! For added flair sprinkle more crushed cookies atop each cheesecake along with drizzles caramel sauce if preferred!
If you want something extra special consider adding dollops whipped cream around edges before placing those gorgeous desserts onto platters ready entertain guests’ eyes palettes alike! Serve immediately after garnishing; however if not consumed right away keep them stored back inside refrigerator until needed later same day!
Serving and Storing Tips
To enjoy your delicious Mini Biscoff Cheesecakes at their best:
Serving Suggestions
When it comes time to serve these delectable treats, presentation is key! Arrange individual cheesecakes on a platter or cake stand for an attractive display that will draw everyone’s attention right away! Consider pairing them alongside fresh berries such as strawberries or blueberries which complement flavors beautifully while adding vibrant colors visually appealing spreads across tablescapes too!
For an even more indulgent experience, offer toppings like chocolate shavings whipped cream drizzles caramel sauce beside each plate allowing guests customize their own servings according personal preferences—encouraging creativity among attendees during gatherings celebrations alike while enhancing enjoyment overall!
If desired accompany plates forks napkins ready beforehand making serving stress-free enjoyable moment both hosts guests alike creating lasting memories around sweet bites shared amongst loved ones family friends gathered together during special occasions like birthdays holidays etcetera!
Storage Guidelines
After enjoying some scrumptious bites leftovers should be stored correctly ensure freshness maintained longer durations possible! Refrigerate any uneaten mini cheesecakes within two hours consumption—they last safely inside fridge up three days maximum provided kept sealed tightly containers prevent drying out developing unwanted textures flavors over time!
If planning ahead longer storage periods consider freezing options instead; simply place individual portions freezer-safe containers leave space expansion freezing process occurs allow safely enjoy later dates whenever cravings strike unexpectedly again! To thaw just transfer desired quantity overnight fridge before serving day-of ensure perfect textures maintained throughout entire indulgence experience once again without compromising quality whatsoever!
With these tips under your belt now go ahead indulge yourself make those delightful miniature creations satisfy every sweet tooth craving imaginable enjoy every single bite guilt-free knowing homemade delights await every occasion coming way soon enough too!
Mistakes to Avoid
When preparing Mini Biscoff Cheesecakes, several common mistakes can hinder your success. The first mistake is using cold ingredients straight from the fridge. For a smooth and creamy filling, ensure that your cream cheese is at room temperature. Cold cream cheese can create lumps in your cheesecake mixture, resulting in an undesirable texture.
Another mistake is overmixing the filling after adding eggs. While mixing is essential for combining ingredients, overmixing introduces too much air into the batter. This can lead to cracks as the cheesecakes bake and cool. Instead, mix just until combined, allowing for a denser and creamier result.
Failing to prepare the crust correctly is another common error. Many people skip the step of finely crushing their Biscoff cookies or do not add enough melted butter. A well-prepared crust holds the cheesecake together; if it’s too crumbly or not pressed firmly into the pan, it will fall apart when served.
Additionally, not baking the cheesecakes in a water bath can lead to uneven cooking and cracks on the surface. A water bath helps regulate temperature and provides moisture during baking. If you skip this step, your cheesecakes may dry out or crack easily.
Lastly, rushing the cooling process can spoil your Mini Biscoff Cheesecakes. Allow them to cool gradually in the oven with the door slightly ajar before transferring them to the refrigerator. Cutting corners here may compromise their flavor and texture.
Tips and Tricks
To achieve perfect Mini Biscoff Cheesecakes, implementing some tips and tricks can elevate your results significantly. Firstly, consider making your own Biscoff cookie crust instead of using store-bought options. Use freshly crushed cookies to enhance flavor and texture while ensuring they are finely ground for even distribution.
A key trick is to use a stand mixer with a paddle attachment for mixing your cheesecake filling. This method provides better control over mixing speed and reduces the risk of overmixing compared to hand whisking or using a hand mixer.
Incorporating sour cream into your filling adds an extra layer of creaminess and tanginess that complements the Biscoff flavor beautifully. Make sure to fold it gently into your mixture after blending other ingredients for an ideal consistency.
Remember that patience pays off when it comes to chilling these desserts. For best results, allow your Mini Biscoff Cheesecakes to chill overnight. Overnight chilling allows flavors to meld together beautifully while achieving a firmer texture.
Lastly, consider garnishing each cheesecake with a drizzle of melted Biscoff spread or crushed cookie crumbs before serving. This final touch enhances presentation while providing an extra burst of flavor that will impress anyone who tries them.
Suggestions for Mini Biscoff Cheesecakes
To enhance your Mini Biscoff Cheesecake experience, exploring various suggestions can make these treats even more delightful. One suggestion is experimenting with different toppings beyond traditional whipped cream. Consider adding caramel sauce or even chocolate ganache for a unique twist on flavor.
You might also want to try incorporating different flavors into your cheesecake filling by adding spices such as cinnamon or nutmeg. This addition brings warmth and complexity that pairs nicely with the biscoff flavor profile without overpowering it.
For those who enjoy a bit of crunch, think about layering some chopped nuts or additional cookie pieces into the cheesecake batter before baking. This creates delightful surprises in texture as guests bite into their dessert.
If you’re looking for healthier alternatives without sacrificing taste, consider substituting half of the cream cheese with Greek yogurt in your filling recipe. Not only does this reduce calories but also adds protein while maintaining that creamy consistency you love.
Finally, if you’re making these cheesecakes ahead of time for an event, consider freezing them instead of refrigerating them long-term. When ready to serve, simply thaw them in the fridge overnight before enjoying their rich flavors at their best!

FAQs
What are Mini Biscoff Cheesecakes?
Mini Biscoff Cheesecakes are individual-sized desserts featuring a creamy cheesecake filling flavored with Biscoff cookies and often topped with caramel or whipped cream. These bite-sized treats are perfect for sharing at parties or enjoying as a sweet indulgence at home.
How long do Mini Biscoff Cheesecakes last?
When stored properly in an airtight container in the refrigerator, Mini Biscoff Cheesecakes usually last up to one week. If you’ve made extras and want them to last longer, consider freezing them for up to three months; just remember to thaw them before serving!
Can I use other cookies instead of Biscoff?
Absolutely! While Biscoff cookies provide unique flavors that complement this recipe well, you can experiment with other types like Oreos or graham crackers based on personal preferences or dietary needs—just be sure they’re finely crushed for optimal crust formation!
How do I know when my cheesecake is done?
The best way to determine if your Mini Biscoff Cheesecakes are done is by checking their center; it should be set but still slightly jiggly when gently shaken—similar to jelly! Once cooled completely in its pan following baking instructions provided earlier will give you consistent results every time!
Can I make these cheesecakes gluten-free?
Yes! To make gluten-free Mini Biscoff Cheesecakes simply opt for gluten-free cookies available at most grocery stores or health food shops as substitutes within this recipe’s crust ingredient list—ensuring all components align with dietary restrictions!
What should I serve with my Mini Biscoff Cheesecakes?
Pairing these delicious mini cheesecakes alongside coffee makes an excellent choice! You might also consider fresh fruit like strawberries or bananas which beautifully contrast rich flavors while adding freshness—perfect accompaniments that enhance every bite!
Conclusion
In summary, crafting perfect Mini Biscoff Cheesecakes involves avoiding common pitfalls such as using cold ingredients and neglecting proper cooling methods. By employing helpful tips like using freshly crushed cookies and incorporating sour cream into your filling mixture, you’ll elevate both flavor and texture significantly.
Experimentation plays a vital role in enhancing these delightful desserts further; feel free to explore various toppings or alternative cookie bases that suit individual preferences while maintaining balance throughout each component involved within this recipe process.
With patience during chilling times paired alongside thoughtful garnishes upon serving—your guests will be amazed by how irresistible each mini cheesecake truly becomes! Enjoy creating memories through delicious bites worth savoring time after time!
Print
Mini Biscoff Cheesecakes
- Total Time: 45 minutes
- Yield: 12 mini cheesecakes 1x
Description
Indulgent individual-sized cheesecakes featuring a buttery Biscoff cookie crust and a creamy cheesecake filling swirled with Biscoff spread, topped with whipped cream and cookie crumbs.
Ingredients
- 20 Biscoff cookies (12 for crust, 8 crumbled for topping)
- 4 tablespoons melted butter
- 16 ounces cream cheese, softened
- 2/3 cup granulated sugar
- 2 large eggs
- 1/2 cup Biscoff cookie spread
- 1/2 cup heavy cream
- 1 teaspoon vanilla extract
- Preheat oven to 325°F (165°C). Line a 12-cup muffin tin with cupcake liners.
- Process 12 Biscoff cookies into fine crumbs, mix with melted butter. Press mixture into the bottom of each liner.
- Beat cream cheese and sugar until smooth. Add eggs one at a time, then mix in Biscoff spread, heavy cream, and vanilla.
- Pour filling over crusts. Bake for 18-20 minutes until centers are slightly jiggly.
- Cool completely, then refrigerate for at least 4 hours. Top with whipped cream and crushed Biscoff cookies before serving.
Instructions
- Preheat oven to 325°F (165°C). Line a 12-cup muffin tin with cupcake liners.
- Process 12 Biscoff cookies into fine crumbs, mix with melted butter. Press mixture into the bottom of each liner.
- Beat cream cheese and sugar until smooth. Add eggs one at a time, then mix in Biscoff spread, heavy cream, and vanilla.
- Pour filling over crusts. Bake for 18-20 minutes until centers are slightly jiggly.
- Cool completely, then refrigerate for at least 4 hours. Top with whipped cream and crushed Biscoff cookies before serving.
Notes
- Allow ingredients to reach room temperature before mixing
- Don’t overbake – centers should still wobble slightly
- Store in refrigerator for up to 5 days
- Prep Time: 25 minutes
- Cook Time: 20 minutes
Nutrition
- Calories: 385
- Sugar: 23g
- Sodium: 280mg
- Fat: 28g
- Saturated Fat: 15g
- Carbohydrates: 32g
- Fiber: 1g
- Protein: 5g
